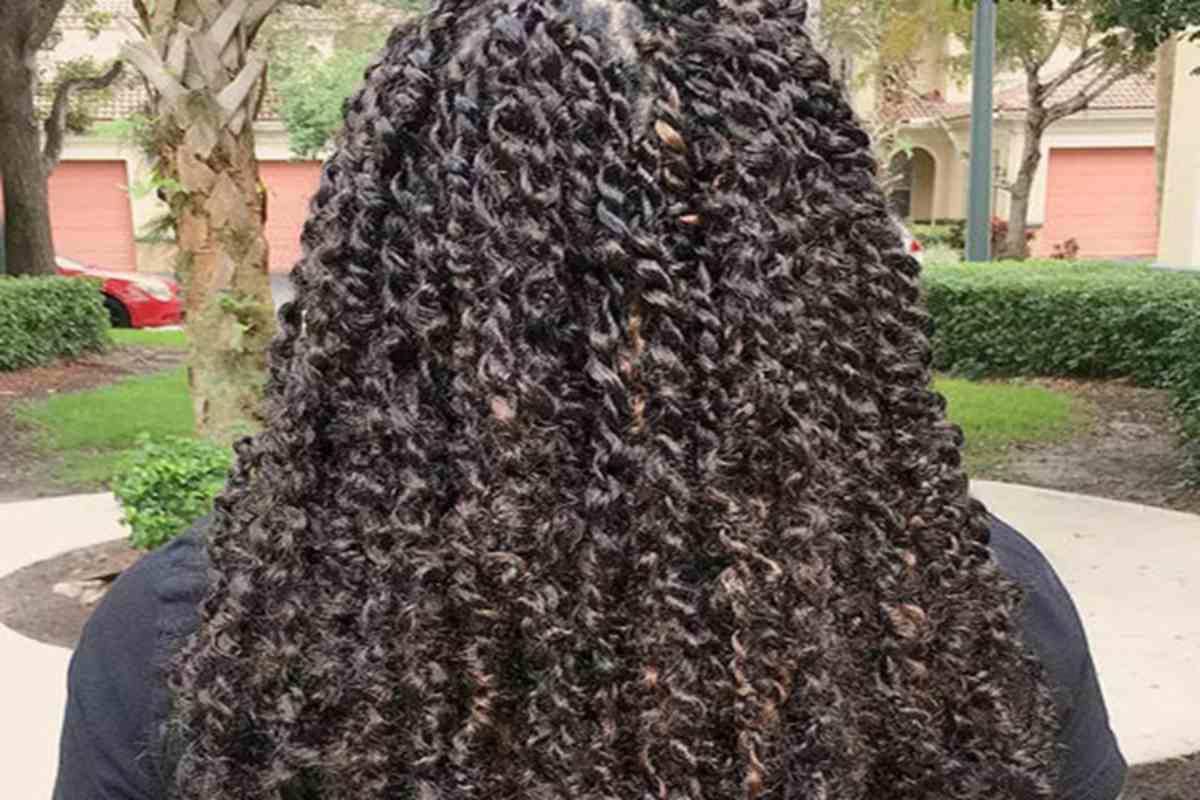
Passion twists are taking the natural hair community by storm. With their classy and protective styling, these elegant twists are becoming a go-to look for many. The best part? You can DIY these beautiful protective hairstyles right from your home.
This comprehensive guide will walk you through how to install stunning passion twists yourself in 5 easy steps with our pre-separated springy afro twist hair extensions. Get ready to embrace your inner stylist and create a head-turning look!
New Design Springy Afro Twist Hair Extensions
Transform your look effortlessly with this 100% human hair Springy Afro Twist Hair Extensions, perfect for creating stylish Butterfly Locs, Passion Twists, and Mini Twists. Achieve a trendy and protective hairstyle with ease.
- Pre-separated
- Easy install
- Save time
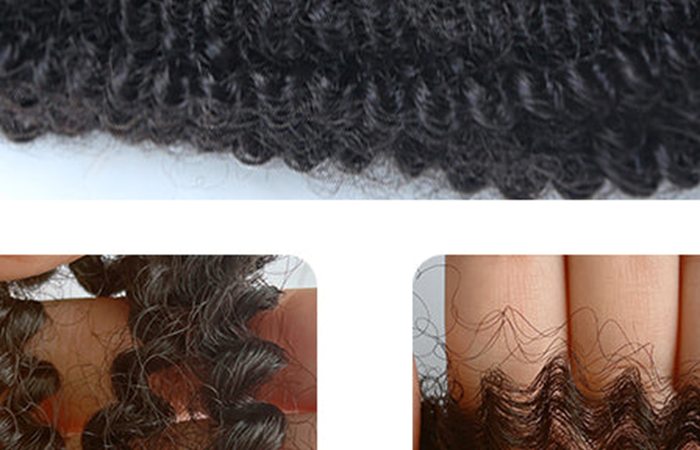
Table of Contents
What You’ll Need for DIY Passion Twists
Before starting the installation process, gather these essential supplies:
- Human hair extensions – usually opt for 2-3 packs of high-quality human hair to complete your look(or depending on how thick and the length you want).
- Wide-tooth comb – for detangling and sectioning natural hair.
- Rat-tail comb – to create neat, precision parts.
- Hair clips and rubber bands – to section hair cleanly.
- Leave-in conditioner – to hydrate and moisturize natural hair.
- Edge control/gel – to smooth hair and edges.
- Setting lotion or mousse – to blend extensions with natural hair.
- Hair ties – to secure twist ends.
- Hair cutting shears – to trim and shape twists.
Step 1: Prep Your Natural Hair
Proper prep is key for flawless passion twists:
- Ensure you wash your hair, detangle it, and moisturize it before you begin.
- Use a wide-tooth comb to create clean sections of hair. Section size will determine twist size.
- Clip back remaining hair securely as you work in sections.
Step 2: Add the Hair Extensions
Once prepped, it’s time to incorporate extensions:
- Fold a piece of human hair in half to create a loop at the top.
- Slide loop under your natural hair section near the roots.
- Pull extension ends through the loop to knot securely.
- Add more extension hair as needed to maintain an even size.
Step 3: Twist Each Section
Maintain tension as you twist each section:
- Continue twisting extension and natural hair together from roots to ends.
- Add more extension hair as needed to maintain even size.
- Repeat process section-by-section for uniform twists throughout.
Step 4: Seal and Secure Twist Ends
Prevent unraveling by sealing ends:
- Use tiny rubber bands or hair ties to securely tie off each twist end.
- For extra hold, dip ends in hot water to seal the knots.
Step 5: Style and Finish Twists
Final touches for a polished passion twist look:
- Use edge control to smooth and sleek hairline and edges.
- Apply mousse or setting lotion to blend twists seamlessly with natural hair.
- Sit under a hooded dryer to set the style (optional).
Maintaining Your Passion Twists
Follow these tips for longevity:
- Gently cleanse scalp and lightly moisturize twists as needed.
- Wear a satin bonnet or scarf at night to protect hair while sleeping.
- Avoid over-manipulating twists to limit frizz and tangling.
With the right tools and following this detailed guide, you can achieve salon-worthy passion twists at home. These beautiful, protective twists are an attainable DIY hairstyle that will have you looking and feeling amazing. Time to embrace your inner stylist!